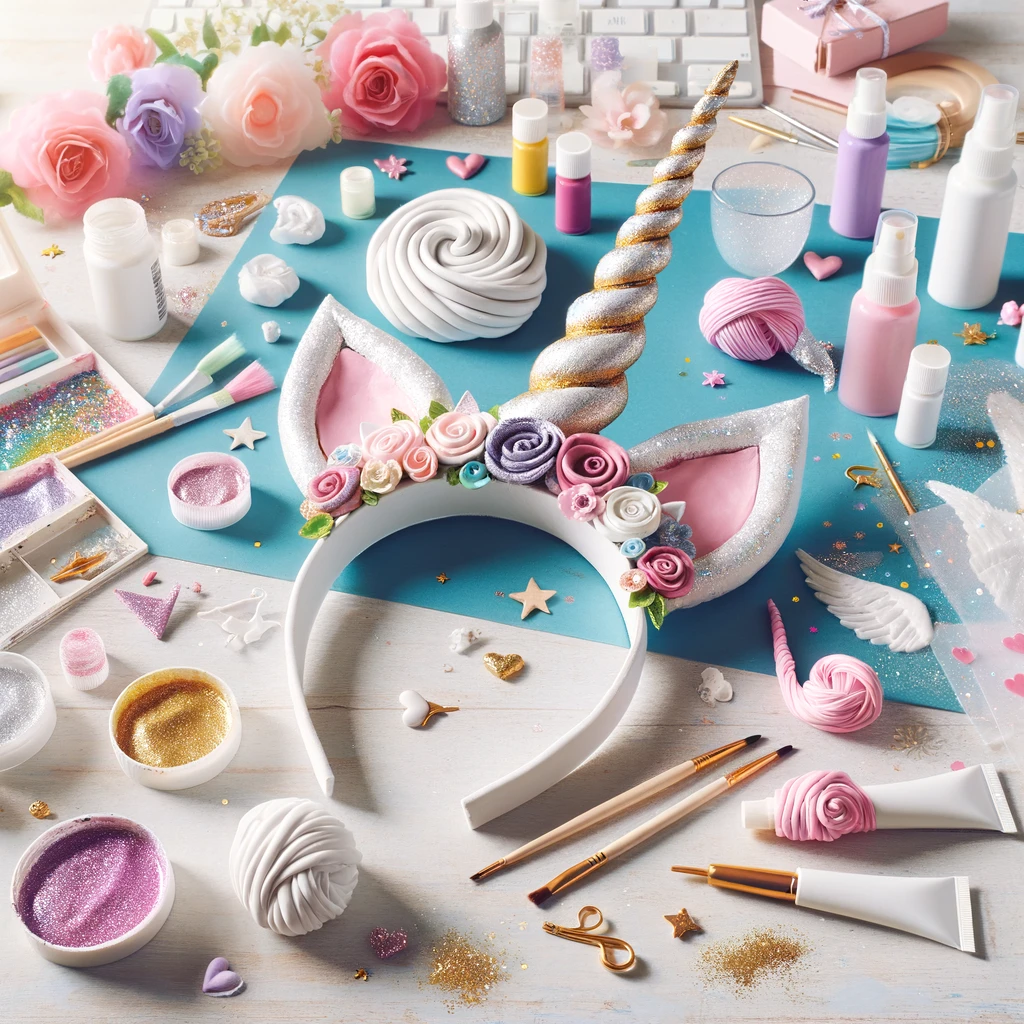
Unleash your creativity and craft your own magical unicorn horn headband with this easy-to-follow DIY guide. This fun project is perfect for themed parties, costume events, or just a whimsical day out.
Materials Needed:
- Sturdy headband
- Lightweight crafting clay
- Acrylic paint (white, pink, or gold)
- Glitter
- Craft glue
- Brush
- Clear sealant spray
Step-by-Step Instructions:
- Shape the Horn: Start by rolling your crafting clay into a long, thin cone. Twist it gently to create the iconic spiral of a unicorn horn. Allow the clay to dry completely as per the instructions on the packaging.
- Paint and Decorate: Once dry, paint the horn in your chosen color. While the paint is still tacky, sprinkle glitter generously over it to give it that enchanting sparkle. Allow the paint to dry completely.
- Attach the Horn: Using strong craft glue, attach the base of the horn to your headband. Hold it in place until it feels secure. Allow the glue to dry for a few hours to ensure that the horn is firmly attached.
- Seal the Glitter: To prevent the glitter from falling off, spray the horn with a clear sealant. This will keep the glitter intact and add a glossy finish.
- Customize Your Headband: Personalize the headband by adding more decorations like artificial flowers, ribbons, or even fabric ears to complete the unicorn look.
Creating your own unicorn horn headband is not just a crafty endeavor but a doorway to expressing your personal style and creativity. Whether for a special occasion or just for fun, this DIY project is sure to bring a touch of magic to your day!